When loading files into Sample it will accept many audio file formats. However if you have a format that is not supported for use with Sample then you can try re-encoding the file using third-party applications like iTunes or Audacity. Below are examples of how to do this with both pieces of software. For more information refer to the supported file types article.
iTunes
If you don't have it already you can download iTunes from here.
You can convert a file to a different format while keeping a copy of the original so you won't lose the original version. For example, you can save a copy of an uncompressed file such as AIFF or WAV to a compressed format like MP3, AAC, or ALAC.
Saving a copy of a file in a new file format
Import the file you wish to convert into iTunes by dragging the file from it's location on the hard drive into the iTunes browser or select 'add to library' from the 'file' menu and then select the file from the browser.
Check the bitrate of the file you would like to re-encode by adding a "Bitrate" column in the iTunes library.
When converting from a compressed to an uncompressed file format (for example, from MP3 to AIFF) you shouldn't notice any reduction in sound quality. However, when converting between compressed formats (for example MP3 and AAC), you may notice a reduction in the sound quality. For the best results, if you want your file encoded in a different format, you should import the music again from the original source using the new encoding format.
To convert a song's file format:
1. Open iTunes Preferences. Windows: Choose Edit > Preferences. Mac:Choose iTunes > Preferences.
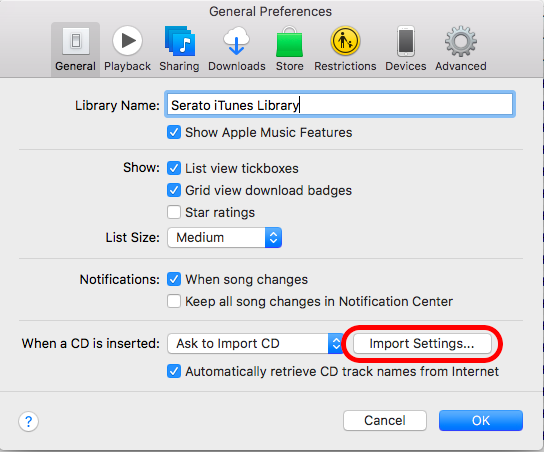
2. Click the General tab, and then click the Importing Settings button in the second section of the window.
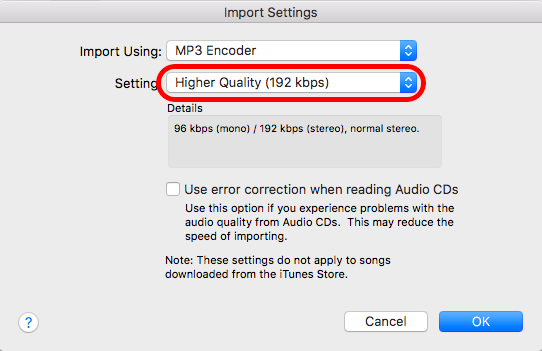
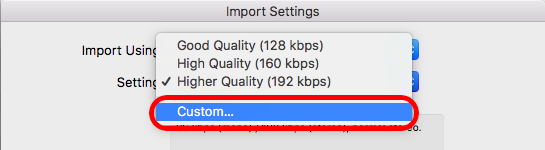
3. From the "Import Using" pop-up menu, choose the encoding format that you want to convert the file to, then click on the settings dropdown, and select 'custom...' from the list. From this window, click on the 'Stereo Bit Rate' dropdown and select 320 kbps.
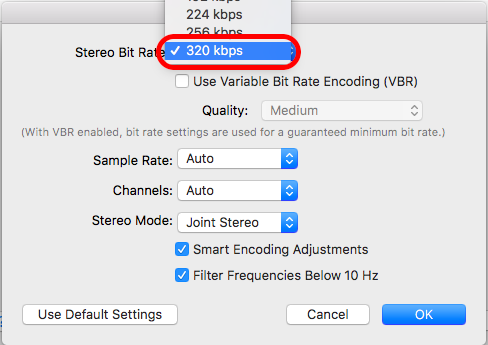
NOTE: Files can't be upsampled to a higher bit rate, so if your tracks aren't at least 320kbps, this won't change the bitrate.
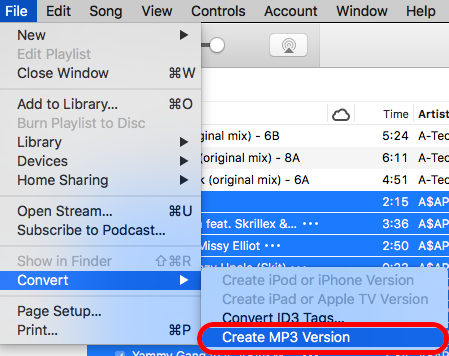
5. The file in its original format and the newly converted song appear in your library. To retrieve the converted file from your library for use in Serato Sample, right click on the file within the iTunes library and select “Show In Finder” (Mac) or “Show in Explorer” (Windows). You will then be able to move the newly converted file to a location of your choice and import it into Serato Sample.
Audacity
If you don't have it already you can download Audacity from here. There is a known issue with Audacity when using Mac OS Sierra (10.12), more detail about that can be found here.
In order to export files in .mp3 format you will also need to download and install the LAME file codec from here> Mac (Download the .dmg version), Windows (Download the .exe version).
Follow the prompts to install the codec on your computer after locating the file in your "downloads" folder.
If the codec is not found when you try to export the file as .mp3 then you can find troubleshooting steps that will resolve the issue here for Mac and Windows.
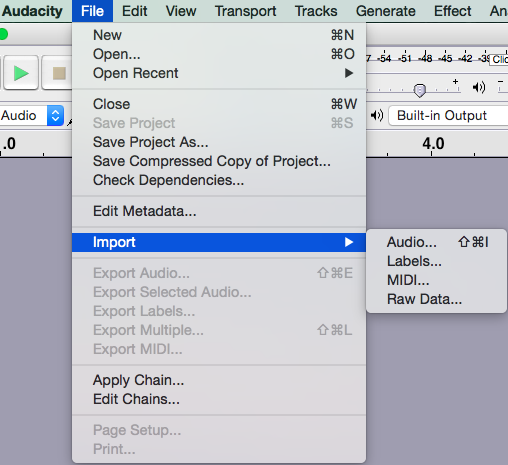
1. Import your file into Audacity by selecting Import>Audio from the 'File' menu. You will now see the waveform of the file displayed in Audacity as below.
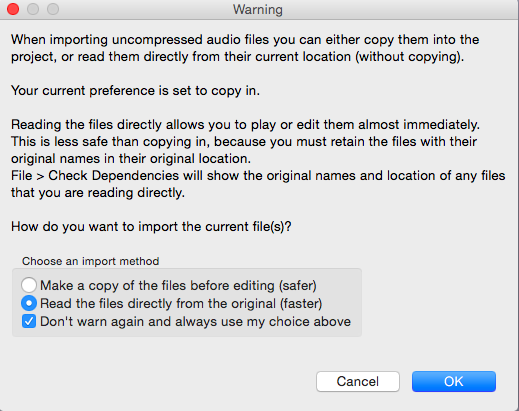
You may be presented with this dialog box, choose to read the files from their original location for faster processing. You can choose whether you would like to see this dialog box each time you import a file also.
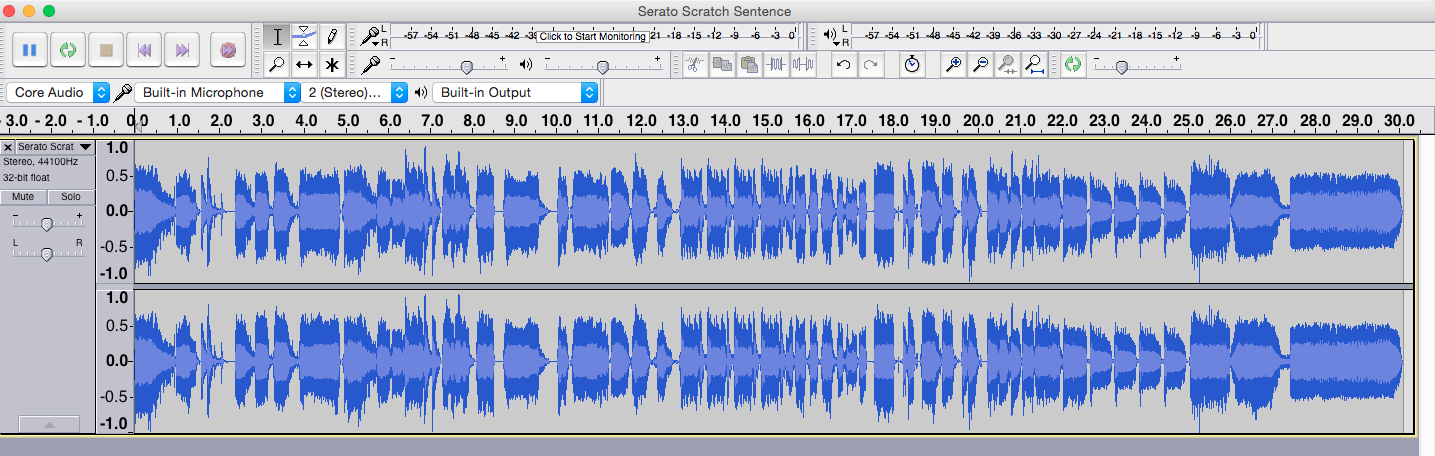
The waveform should look like this once it is imported correctly.
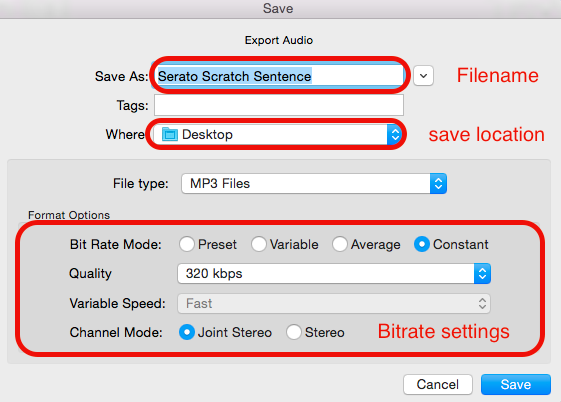
2. Select "Export" from the "file"menu, you can choose from a number of file format options that are supported in Serato Sample, in this example we have used .mp3. You can also set the location for the file to export to, the file name and file quality. We have chosen a "Constant" bit rate at 320kbps for the best quality.
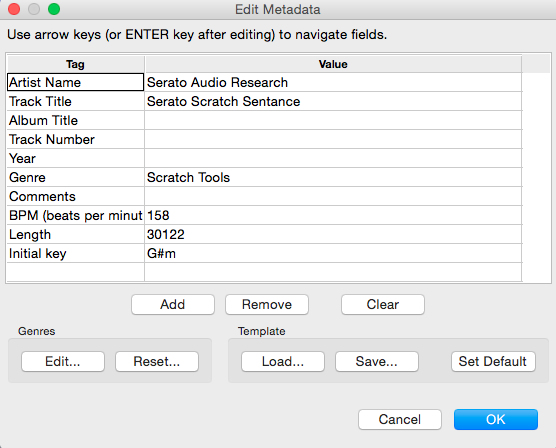
3. After selecting "save" you can edit the file tags for the file you are exporting, this will make the file easier to locate when you search for it. It can also store important information about the file like BPM and Key.
4. Your file will now be exported in the location you selected at step 2.