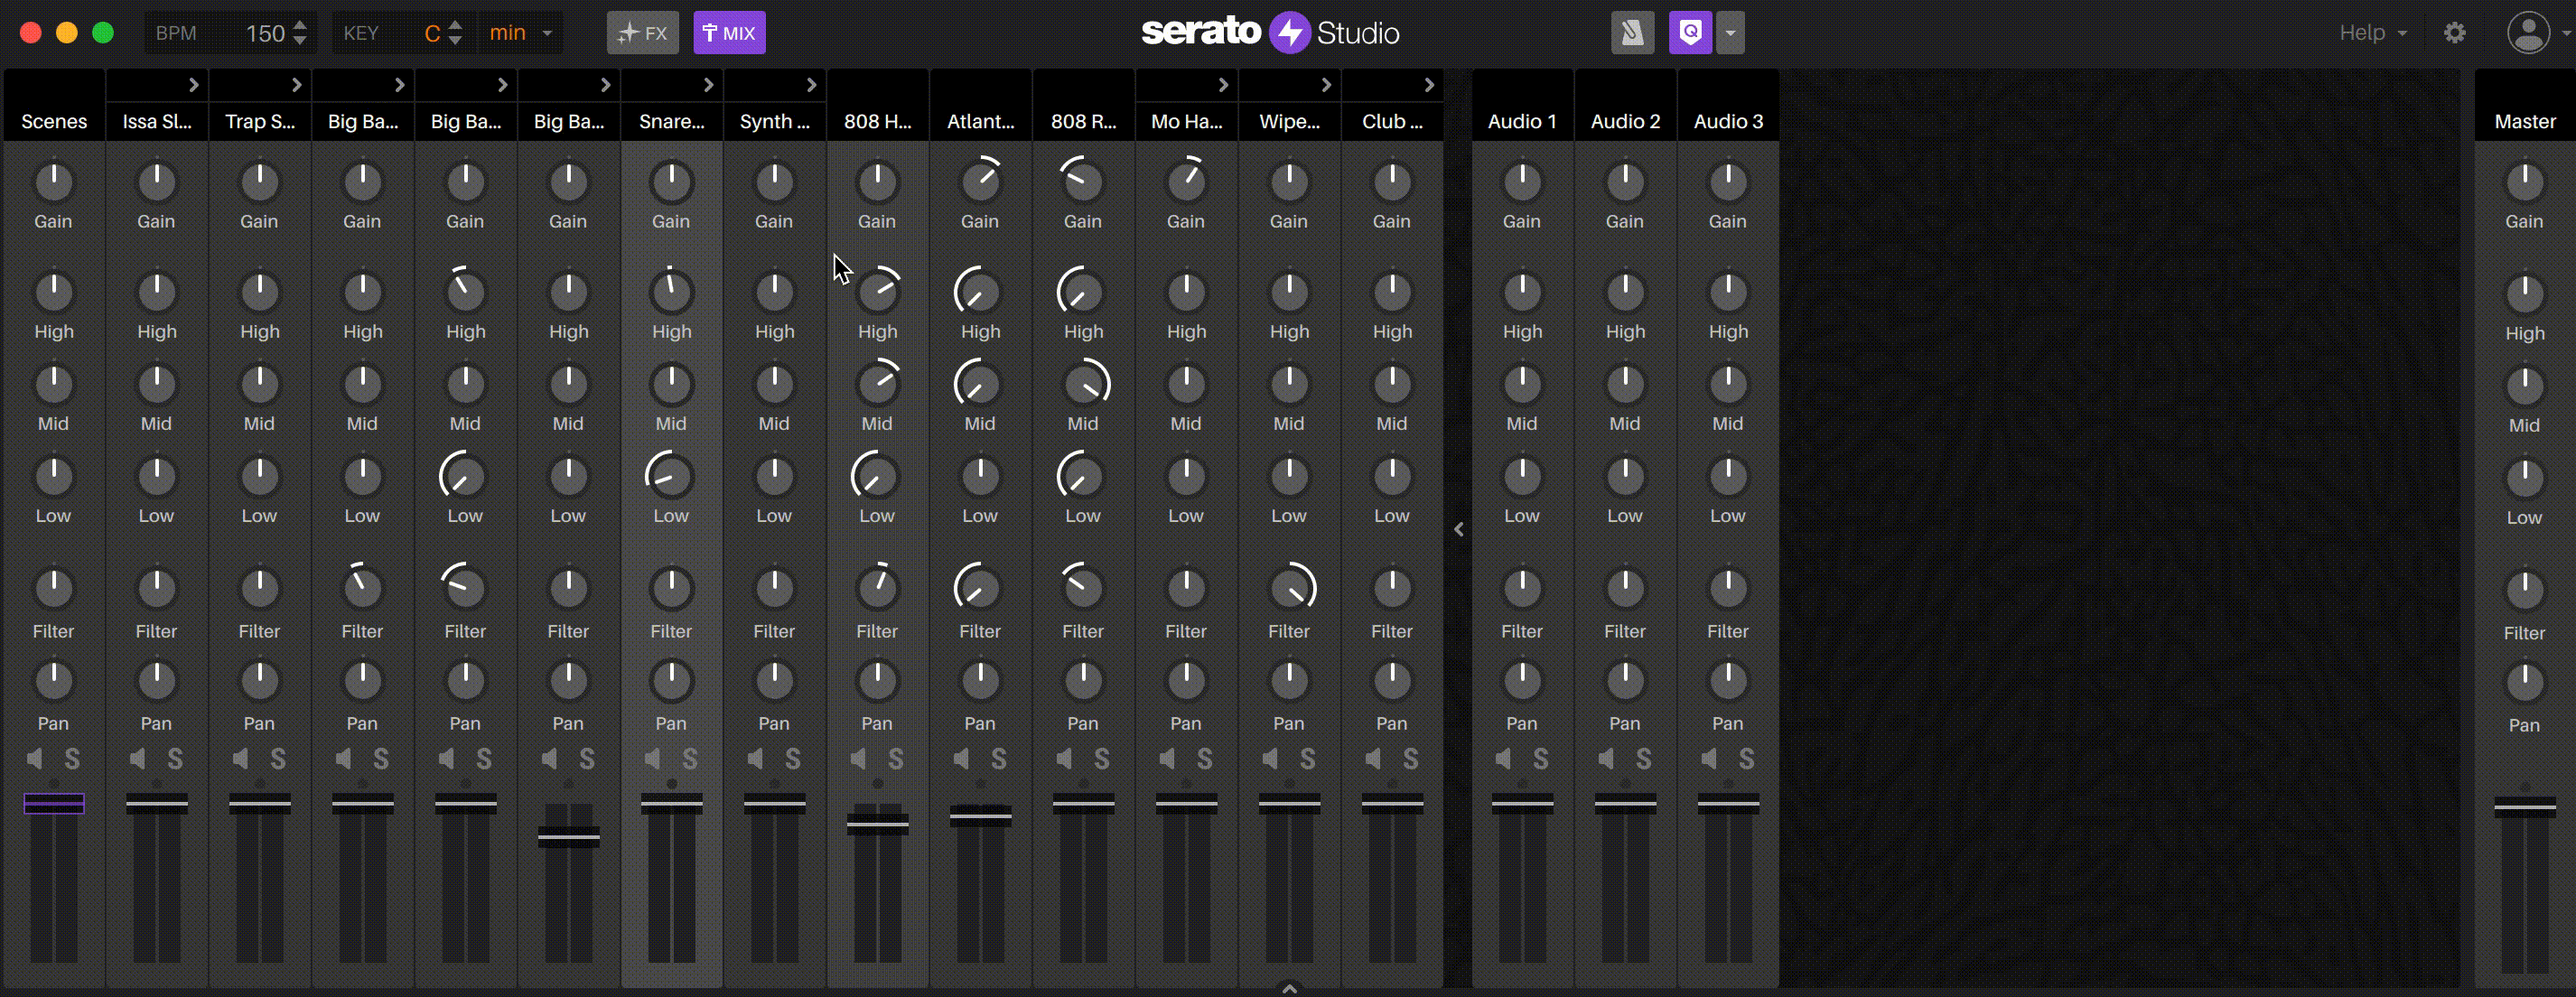
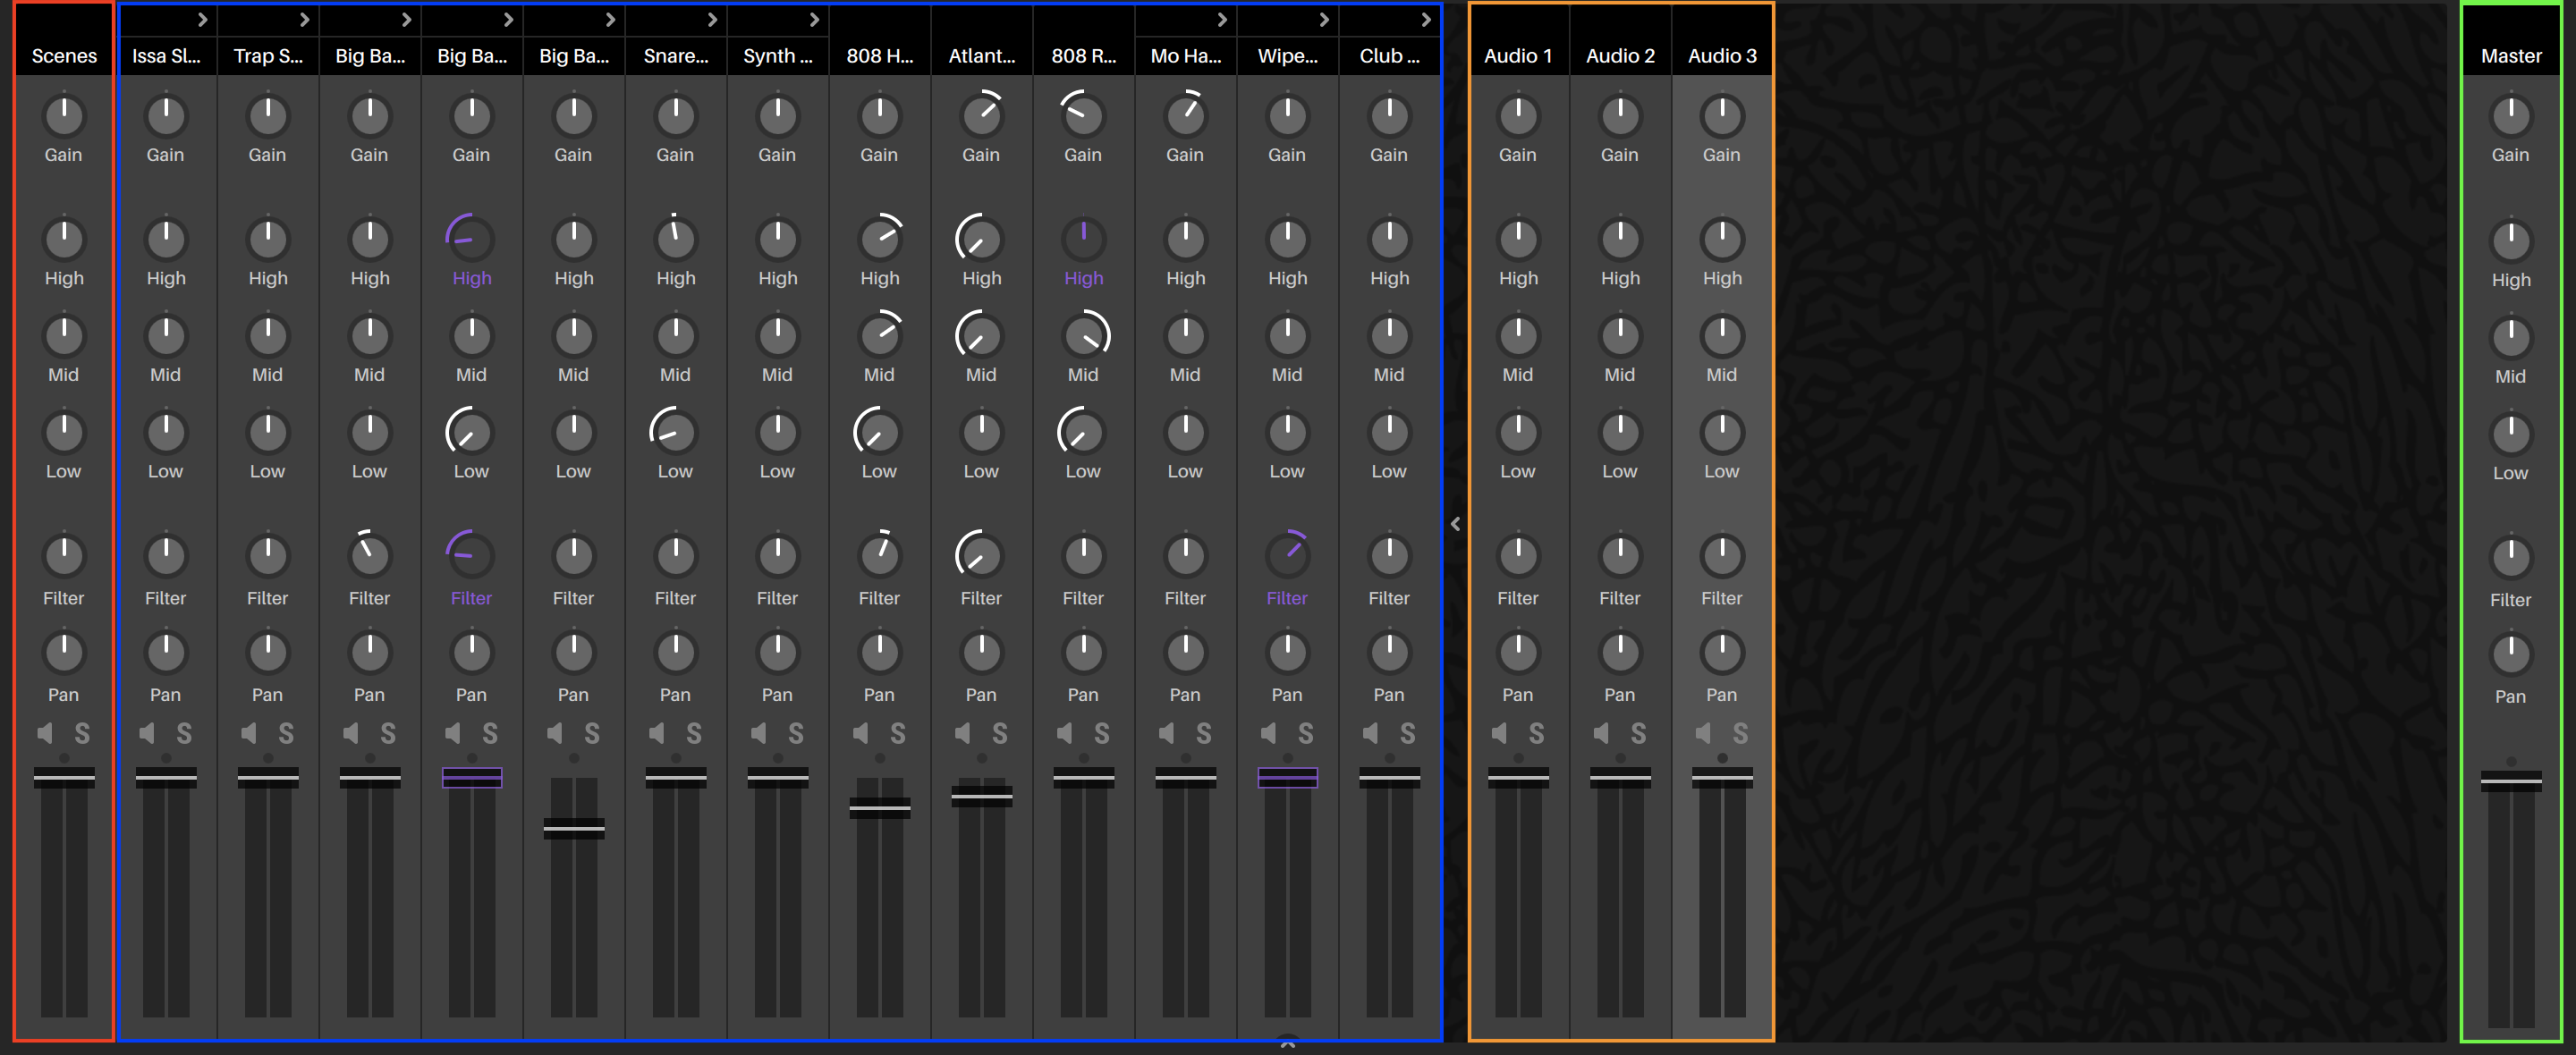
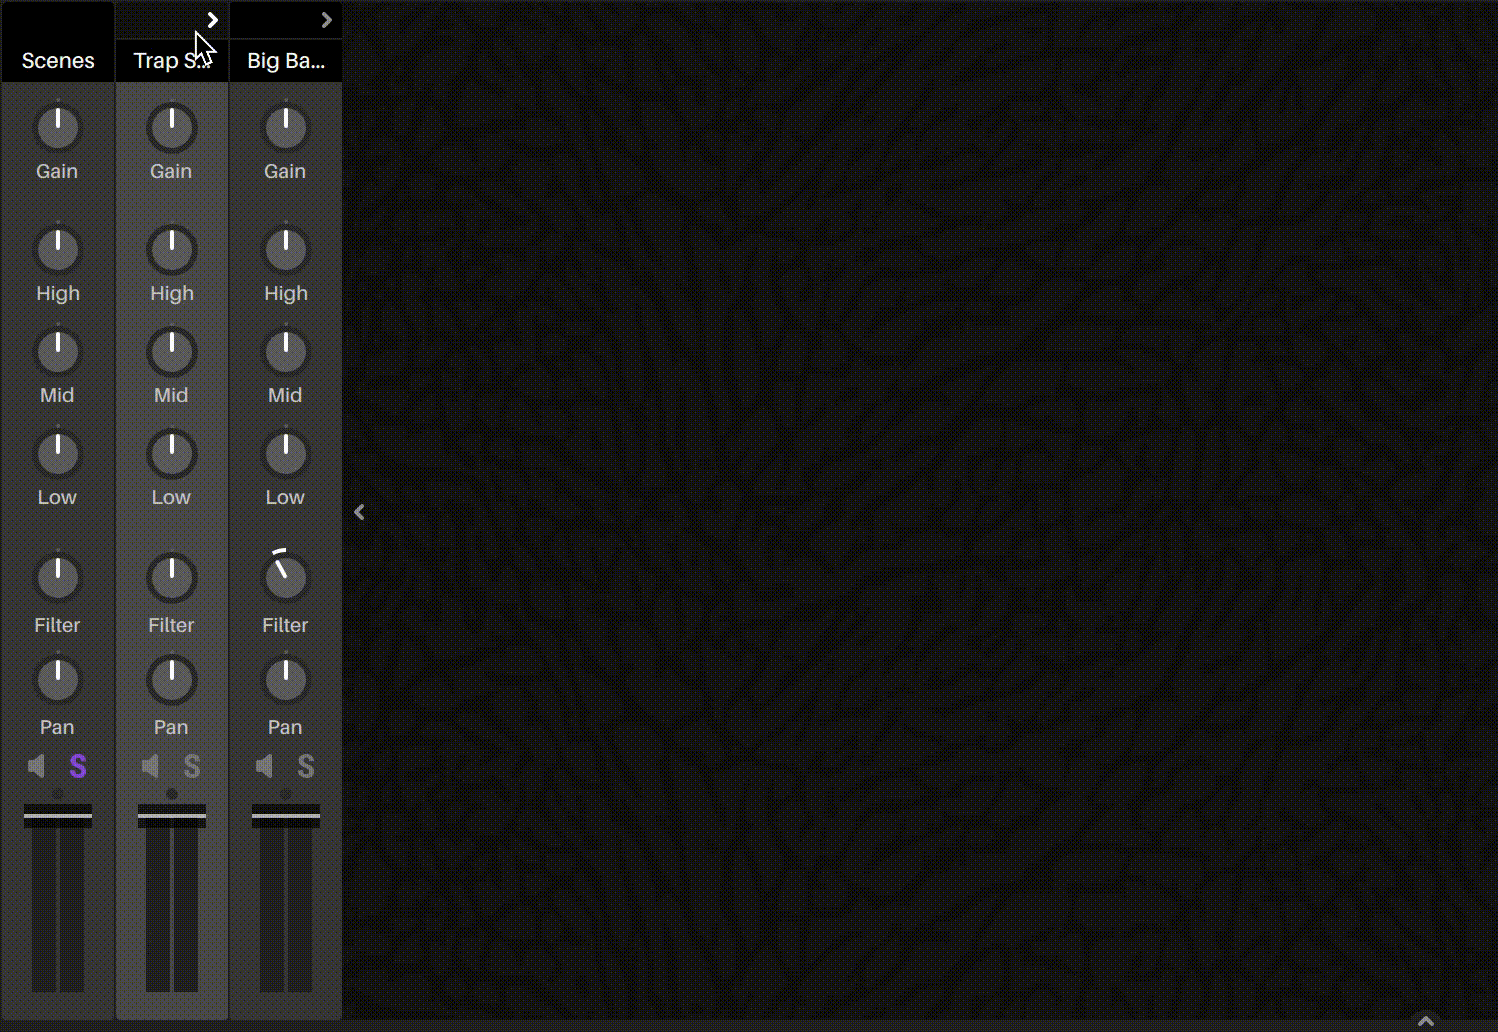
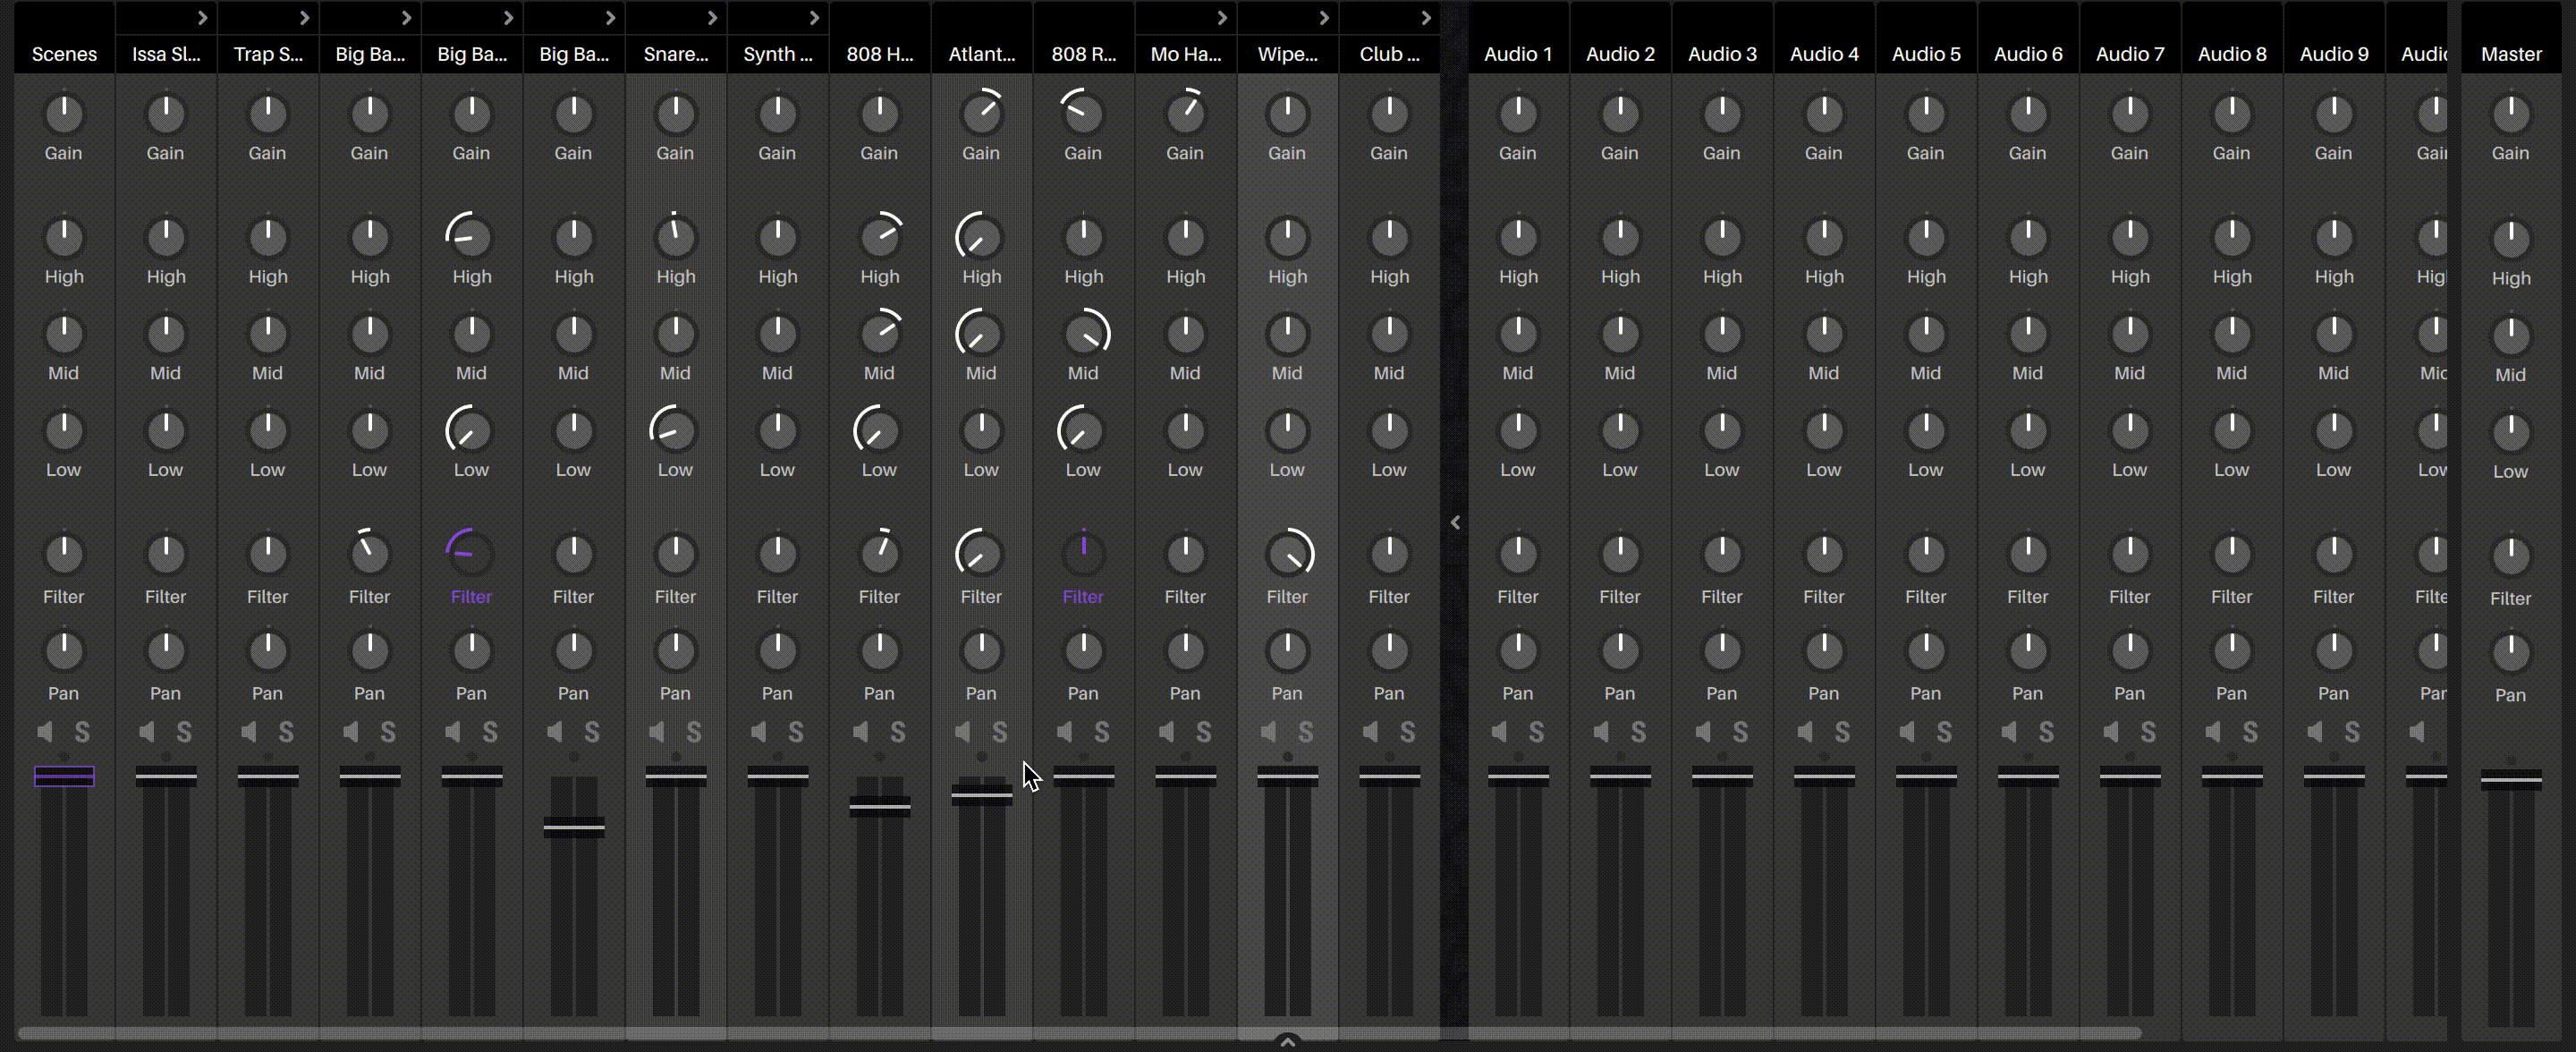
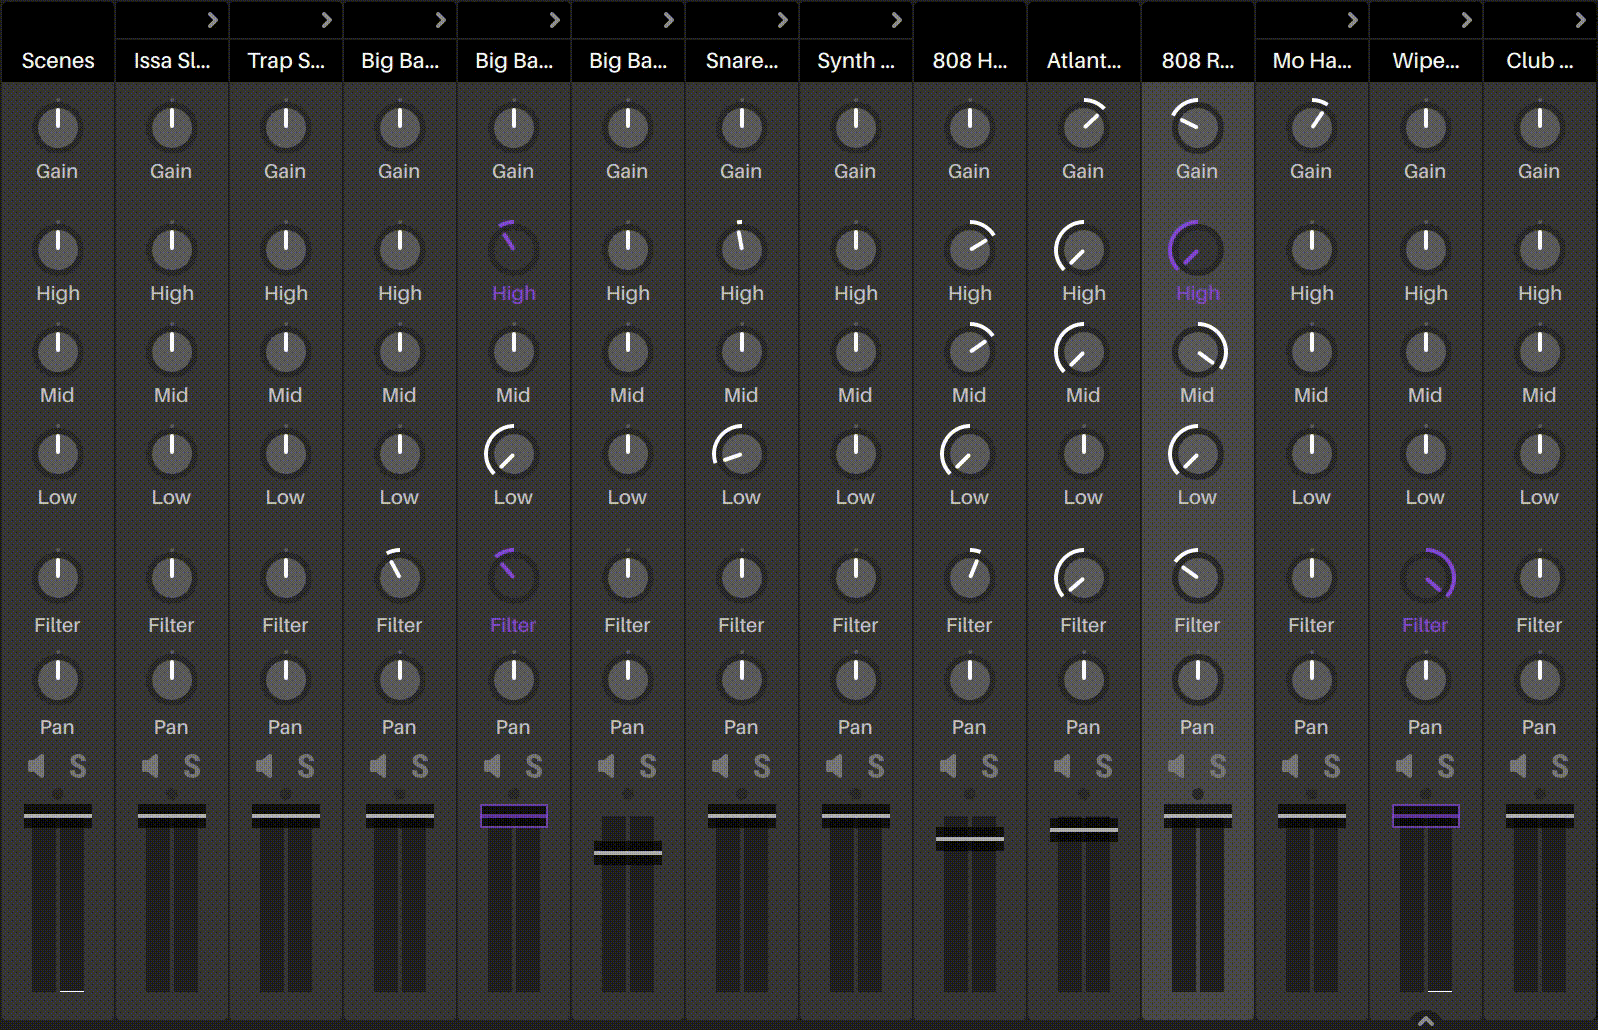
The Mixer View collectively brings together all of the mixer channels from your project into one contained view. You can adjust the individual mixer parameters for the decks in your project, along with the scene and master channels.
Channel Break Down
Scenes channel - Pinned to the left-hand side of the Mixer view window. As shown in RED below.
Scene Deck channels - Stacked to the right of the Scenes channel. Contains Sample, Drum, Instrument, and Plug-in Decks. As shown in BLUE below.
Audio Track channels - Stacked to the right of the Scene Decks channel. As shown in ORANGE below.
Master channel - Pinned to the right-hand side of the Mixer View window. As shown in GREEN below.
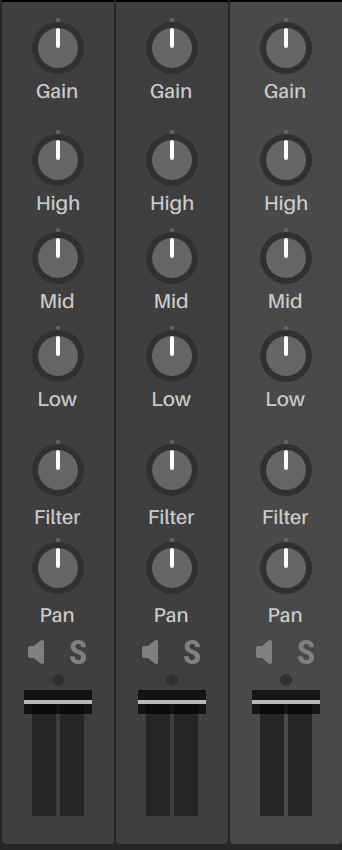
Channel Parameters
Each of the Mixer Channels has the following controls:
Gain: Increases or decreases the maximum volume that the selected can reach.
High: Reduces or increases the high-frequency content on the channel.
Mid: Reduces or increases the mid-frequency content on the channel.
Low: Reduces or increases the low-frequency content on the channel.
Filter: Turn clockwise to engage a high pass filter, and counter-clockwise to engage a low pass filter, on the channel.
Pan: Send a percentage of the audio signal to either left or right stereo fields. Turn clockwise to pan right, and counter-clockwise to pan left.
Mute: Mute all of the audio from the corresponding mixer channel. Click the button again to unmute the audio.
Solo: Enabling this to only play audio from the corresponding mixer channel. You can Solo multiple tracks at once by holding Command/control and clicking the Solo button.
Peak: A small red indicator will light up directly above the fader when the channel signal exceeds 0db. Decrease channel gain or volume to avoid this.
Fader: Click and drag the fader up to increase the volume, or down to decrease the volume of the channel.
Expand and Collapse
Expand and collapse the mixer channels of Drum and Sample decks by clicking on the arrow located at the top of the channel. This will reveal controls for the individual drums or pads in that deck.
The Scene Deck channels can be collapsed to allow more room to work on the Audio Track Channels. Click on the arrow to the right of the Scene Deck channels to expand and collapse this section.
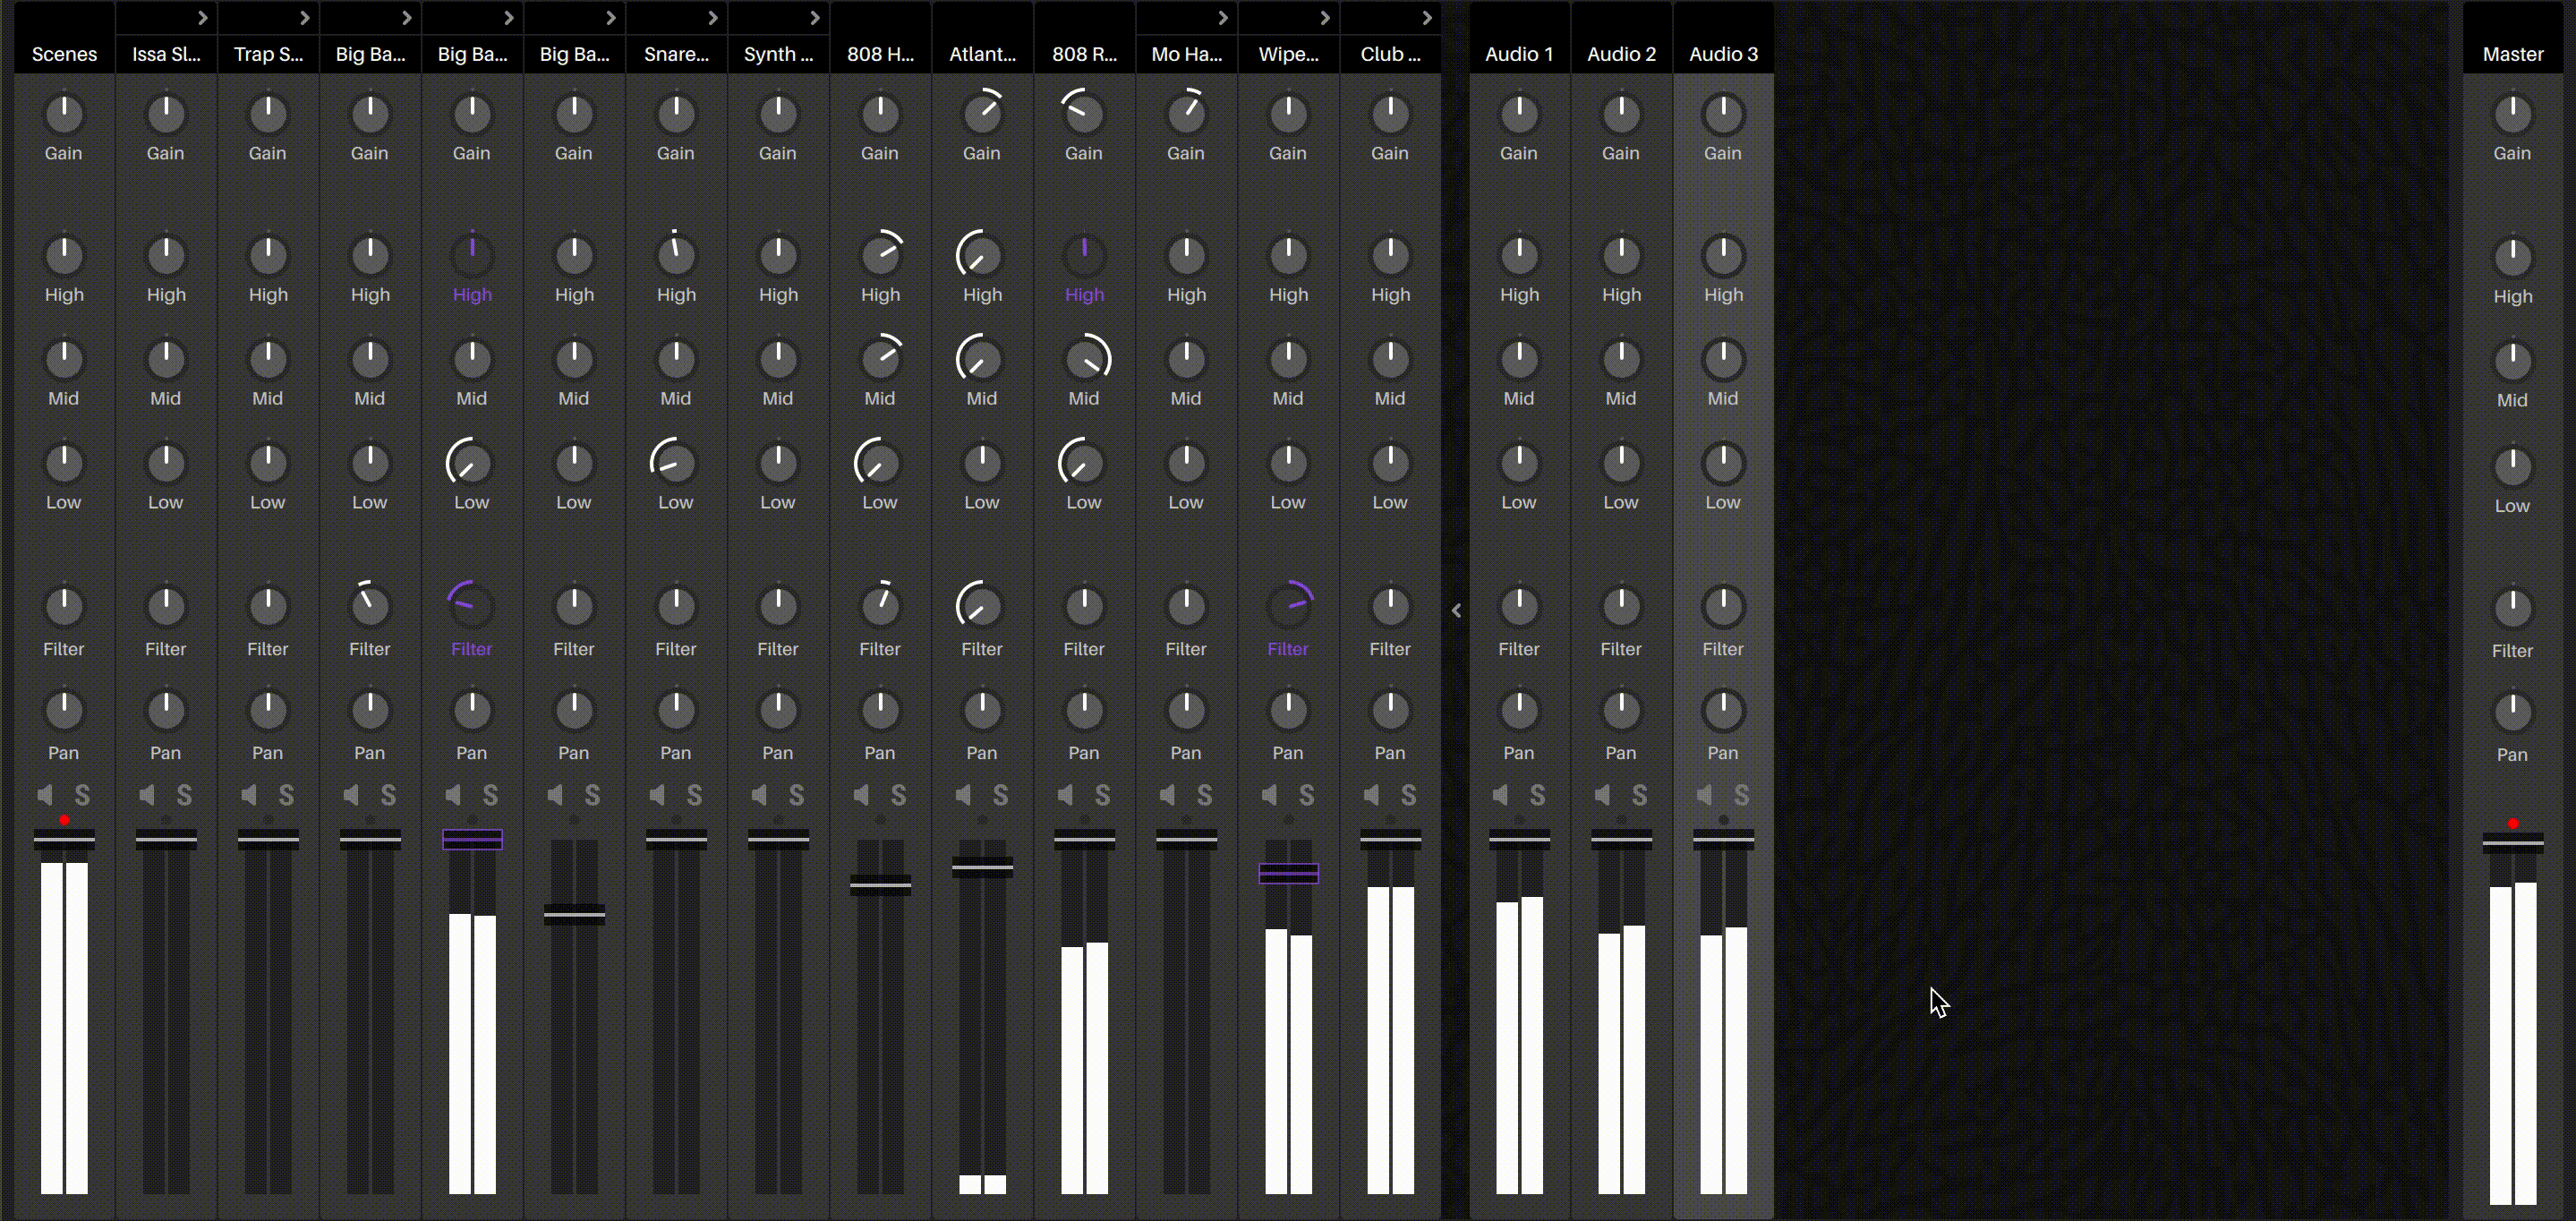
Automation
Parameters with assigned automation will be highlighted purple and move in real-time during playback.
Right-clicking on a parameter will give you the options to Show Automation or Reset Automation.
Clicking Show Automation will take you back to the Scene Deck view with the automation for the corresponding parameter selected.
Click Reset Automation to remove the automation assigned to that parameter.
FX
FX can be added to channels from the Mixer view. First, enable the FX panel from the Project Toolbar, then select the channel you wish to apply the FX to by clicking on it.